
Figure 1 - Servo Motor
Servo Motor
Unlike dc motors, with servo motors you can position the motor shaft at a specific position (angle) using control signal. The motor shaft will hold at this position as long as the control signal not changed. This is very useful for controlling robot arms, unmanned airplanes control surface or any object that you want it to move
at certain angle and stay at its new position.
Servo motors may be classified according to size or torque that it can withstand into mini, standard and giant servos. Usually mini and standard size servo motors can be powered by Arduino directly with no need to external power supply or driver.
at certain angle and stay at its new position.
Servo motors may be classified according to size or torque that it can withstand into mini, standard and giant servos. Usually mini and standard size servo motors can be powered by Arduino directly with no need to external power supply or driver.

Figure 2 - Servo Motor Wire
The third pin accept the control signal which is a pulse-width modulation (PWM) signal (Figure 3). It can be easily produced by all micro- controllers and Arduino board. This accepts the signal from your controller that tells it what angle to turn to. The control signal is fairly simple compared to that of a stepper motor. It is just a pulse of varying lengths. The length of the pulse corresponds to the angle the motor turns to.

Figure 3 - Conrol Signal (PWM)
. Servo Motor Control with Arduino
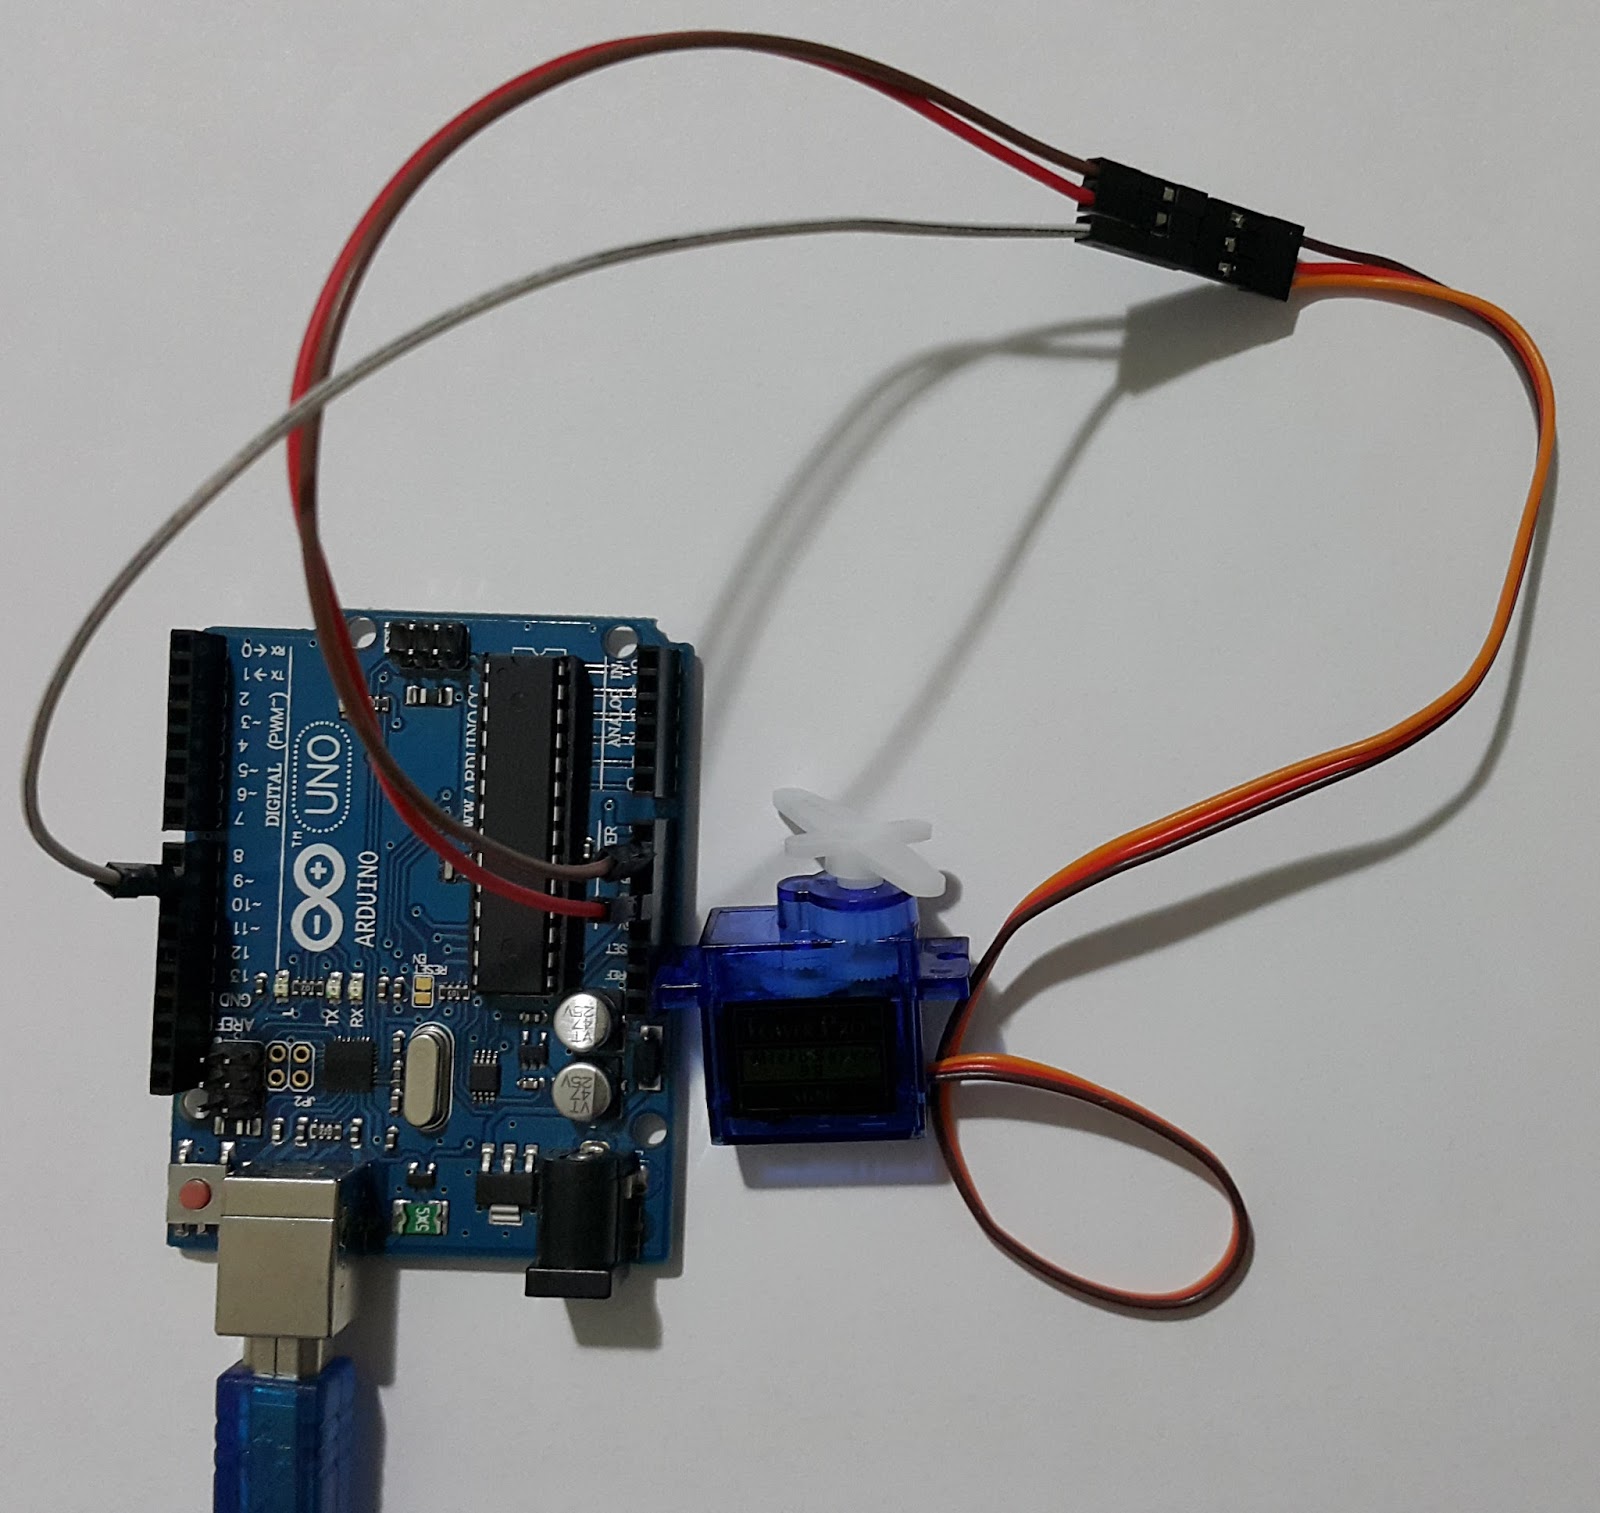
Figure 4 - Arduino UNO and Servo Motor
1. Connect the black wire from the servo to the Gnd pin on the Arduino
2. Connect the red wire from the servo to the +5V pin on the Arduino
3. Connect the third wire (usually orange or yellow) from the servo to a digital pin on the Arduino

Figure 5 - Arduino Servo Motor Circuit
Arduino Programı
#include <Servo.h>
Servo myservo;int pos = 0;
int x;
void setup()
{
Serial.begin(9600);
myservo.attach(9);
}
void loop()
{
if(Serial.available())
{
pos = Serial.read();
if(pos>0)
{
x=pos;
}
}
myservo.write(x);
}
SerialCom V1.2 Program

Figure 6 - SerialCom V1.2.
C# 2013 Codes
private void Form1_Load(object sender, EventArgs e)
{
string[] ports = SerialPort.GetPortNames();//Seri Portu Oku
foreach (string port in ports)
{
comboBox1.Items.Add(port); //Seri Portu Listeye At
}
timer1.Enabled = true; //Zamanı Görüntülemek için Timer1 Aktif Et
}
private void button1_Click(object sender, EventArgs e)
{
string x = comboBox1.SelectedItem.ToString();
serialPort1.PortName = x;
serialPort1.BaudRate = 9600;
//serialPort1.Open();
}
private void button2_Click(object sender, EventArgs e)
{
try
{
if (!serialPort1.IsOpen)
serialPort1.Open();
}
catch
{
MessageBox.Show("Seri Port Seçin!");
}
}
private void button3_Click(object sender, EventArgs e)
{
serialPort1.Close();
}
private void timer1_Tick(object sender, EventArgs e)
{
textBox1.Text = DateTime.Now.ToLongTimeString();
}
private void trackBar1_Scroll(object sender, EventArgs e)
{
if (serialPort1.IsOpen == true)
{
int PWM_deger = trackBar1.Value;
textBox2.Text = trackBar1.Value.ToString();
// int değeri byte a dönüştürme işlemi.
byte[] b = BitConverter.GetBytes(PWM_deger);
serialPort1.Write(b, 0, 4);
}
else // gerçekleşmemişse hata mesajı verir.
{
textBox2.Text = "Cihaz Bağlı Değil";
}
}
}
}
Do not forget to type " using System.IO.Ports;" when writing the program. This library provides the serialPort object to work.
Project FilesYou can download project files by clickin the links.
Hiç yorum yok:
Yorum Gönder